Bring the Coastline Indoors with a DIY Sea and Beach Shadowbox
There is a specific kind of quiet that only happens at the edge of the ocean. The rhythm of the waves, the texture of the sand underfoot, and the vast openness of the horizon can instantly lower your heart rate. For many of us, however, that coastline is hours away, accessible only during vacations or long weekends. This is where the Sea and Beach Shadowbox comes in. It isn't just a piece of wall art; it is a tangible reminder of calmness that you can build yourself and place right in your living room, bedroom, or even a high-stress office environment.
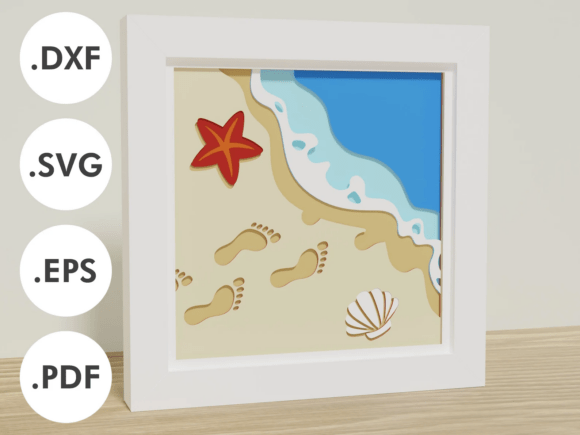
This project transforms a flat surface into a three-dimensional scene featuring a serene sea and delicate footprints trailing through the sand. Designed specifically for crafters who own cutting machines like Cricut or Silhouette, this pattern allows you to cut, layer, and assemble a professional-looking display without needing advanced artistic skills. The result is a custom decor item that brings the summer vibe into your space year-round, acting as a visual anchor for relaxation whenever you need it.
Why Build a Layered Paper Scene?
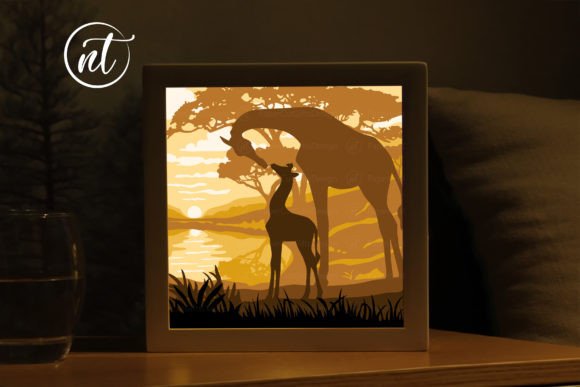
In an era of mass-produced home decor, there is a growing desire for items that feel personal and intentional. A Sea and Beach Shadowbox offers depth that a standard photograph or poster simply cannot match. By stacking seven distinct layers of paper, you create shadows and highlights that mimic the natural undulations of dunes and the rolling motion of water. This tactile quality draws the eye and invites viewers to linger, making it a superior choice for spaces where you want to encourage mindfulness.
The beauty of this specific design lies in its versatility. The pattern is provided in multiple file formats—PDF, SVG, EPS, and DXF—ensuring compatibility with virtually any digital cutting tool. Whether you are a seasoned maker who tweaks every node in your design software or a beginner who prefers to hit "make" and let the machine do the work, the files are ready to go. The base size is set at 158x158mm (approximately 6.25x6.25 inches), designed to fit snugly into a 160x160mm frame. However, one of the most practical features is scalability. You can resize the design to fit a large statement piece for a hallway or shrink it down for a desk accessory, giving you complete control over the final product's impact.
Real-World Applications for Different Lifestyles
While the immediate appeal of a beach scene is obvious for home decoration, the utility of this shadowbox extends far beyond the living room mantle. Different users can leverage this project to solve specific environmental or emotional needs.
Creating a Calm Office Sanctuary
For freelancers and remote workers, the boundary between work and rest often blurs. A small, framed Sea and Beach Shadowbox placed on a desk or hung near a monitor can serve as a visual reset button. When screens cause eye strain or deadlines induce anxiety, glancing at the layered footprints in the sand can trigger a mental shift toward tranquility. Unlike generic motivational posters, this handmade element adds a touch of warmth and humanity to a sterile workspace, reminding you that there is a world outside of emails and spreadsheets.
Therapeutic Crafting for Mental Health
The process of assembling the shadowbox is just as valuable as the finished product. For hobbyists looking for a low-stakes creative outlet, the act of weeding vinyl, sorting cardstock layers, and carefully adhering each piece requires focus and fine motor skills. This repetitive, mindful activity can be meditative, helping to quiet a busy mind. Educators and therapists might also find this useful as a group activity. The clear instructions and pre-designed layers make it accessible for students or clients to assemble, fostering a sense of accomplishment and providing a concrete representation of a peaceful place they can visualize during stressful moments.
Small Business and Retail Display
Entrepreneurs running boutique shops, spas, or coastal-themed cafes can use these shadowboxes to enhance their brand atmosphere. A salon waiting area decorated with serene ocean scenes reinforces a message of relaxation before a client even sits in the chair. Because the design is scalable, business owners can create a cohesive look across different locations or match existing frame sizes without commissioning expensive custom art. Furthermore, makers who sell handmade goods can produce these in batches. Since the pattern includes a free, easy-to-assemble frame design, the material cost remains low, allowing for a healthy profit margin while offering customers a unique, hand-crafted item.
Practical Considerations Before You Start
Before downloading the files and firing up your cutter, there are a few practical elements to consider to ensure the best outcome. While the pattern is designed to be user-friendly, the magic of a shadowbox relies heavily on the materials you choose and how you handle the depth.
Material Selection: The number of layers in this design is seven, plus one extra if you are adapting it for a store-bought frame. To achieve the desired 3D effect, you need cardstock with enough rigidity to hold its shape but thin enough to stack without bulging awkwardly. Standard 65lb to 80lb cardstock usually works best. If you choose papers that are too thick, the frame may not close properly; too thin, and the layers might warp over time. Consider using varying shades of blue and beige to enhance the depth perception—the darker the layer, the further back it should generally sit to mimic natural lighting.
Framing Options: One of the standout features of this package is the inclusion of a digital file for a DIY frame. This is ideal if you want to match the paper colors exactly or keep costs down. The specified frame size is 6.3x6.3x0.8 inches (16x16x2 cm). However, if you prefer a more polished look with glass or acrylic fronting, you can easily adapt the design for a store-bought shadowbox. Just remember that if you switch frames, you may need to adjust the spacing between layers or add an additional backing layer to fill the depth, which is why the pattern includes that extra layer option.
Assembly Precision: When working with intricate details like footprints in the sand or wave crests, alignment is key. Use a lightbox or a bright window to line up your layers before applying adhesive. Foam tape or silicone bumpers between layers will create the necessary separation for shadows to form. Without this spacing, the piece will look flat, defeating the purpose of the shadowbox style.
Making It Your Own
The true power of the Sea and Beach Shadowbox lies in its adaptability. While the default design captures a classic summer day, you are not bound by those colors. Imagine creating a moonlit version using deep navies and silvers for a bedroom nightstand, or a sunrise palette with soft pinks and oranges for a nursery. The scalable nature of the SVG and DXF files means you can test these variations digitally before committing to cutting expensive cardstock.
Moreover, this project serves as an excellent gateway for those new to layered papercraft. It teaches fundamental skills like layer management, adhesion techniques, and spatial planning without overwhelming the creator. Once you complete this beach scene, you will likely find yourself looking at other images and wondering how they would look in 3D. It sparks a creative momentum that can lead to a whole gallery of handmade art throughout your home.
Ultimately, bringing the beach to you is about more than just decoration; it is about curating an environment that supports your well-being. Whether you are a marketer needing a calming backdrop for video calls, a parent wanting to teach a child about the ocean, or simply someone who misses the sound of the waves, this DIY project offers a constructive and rewarding solution. With the files ready in PDF, SVG, EPS, and DXF formats, the only thing left to do is choose your paper, cut your layers, and let the summervibe transform your space.